
If you already have a working WordPress site that you wish to move to Pendeo, this guide will explain how to move it.
Overview
- Create a database dump of your existing site
- Import your database into Pendeo
- Update the $table_prefix variable in wp-config.php
- Copy the wp-content folder from your existing site to your Pendeo site
- Reset your Pendeo file permissions
- Update all instances of the existing WordPress Address (URL) in the Pendeo database
Important – this guide assumes your Pendeo site is blank and has no existing content or themes installed. If you already have content you should copy it to the source site before proceeding.
You will need to know:
- your Pendeo sFTP username and password – check the Pendeo control panel
- your Database Admin URL – check the Pendeo control panel
- your database username and password – this can be found in your site’s wp-config.php file – use sFTP to access your site, download the wp-config.php and open it in an editor – the following lines contain the information you need:
define('DB_USER', 'Username');
define('DB_PASSWORD', 'Password');
Step 1 – Create a database dump of your existing site
Working on your existing site:
- Make a database dump of your existing WordPress site and save to your computer. You may need to request this from your existing hosting provider if you do not have the facilities to make a database dump yourself.
Step 2 – Import your database into Pendeo
Important – this step will result in all data in the Pendeo site’s database being overwritten with the data from your existing site. From now and until you complete the final steps, your site will not be accessible.
Working on your Pendeo site, do the following:
- Login to your Pendeo Database Admin using your database username and password.
- Create a database dump as a backup.
- Delete [drop] all existing tables.
- Import the existing site database dump
- Confirm that all tables have been imported
- Make a note of the table prefix being used – this will be something like “wp_” or some other string prefixing each table name.
Step 3 – Update $table_prefix variable in wp-config.php
Important – for improved security, you should not use “wp_” as your table name prefix. If the tables imported in Step 2 have this prefix, we recommend renaming them with a random string before proceeding below. Here’s an article explaining how to change your WP database table prefixes
If you don’t need to change your table name prefixes, you simply need to update your installation with the newly imported table prefix- here’s how:
sFTP to your Pendeo site and edit wp-config.php, updating the $table_prefix variable to match the prefix of the newly imported tables. For example if your newly imported tables have the prefix ‘hbswm_’, then your variable would like this:
$table_prefix = 'hbswm_';
Save wp-config.php back to your Pendeo site.
Step 4 – Copy the wp-content folder from your existing site and upload it to your Pendeo site
Working on your existing site, do the following:
- Download a copy of your existing site’s wp-content folder – make sure you copy all sub folders.
Working on your Pendeo site, do the following:
Important – this step will result in all files and folders in the Pendeo site’s wp-content folder being overwritten with the wp-content folder from your existing site.
- Use sFTP to download a copy of your Pendeo site’s wp-content folder and store it some where safe as a backup.
- Delete your wp-content folder.
- Use sFTP to upload the existing site’s wp-content folder to the root of your Pendeo site.
Step 5 – Reset your Pendeo file permissions
Use the Pendeo control panel to reset the file permissions (if this option is not available, contact support).
Step 6 – Update all instances of the existing WordPress Address (URL) in the Pendeo database
If you are changing the site URL (your WordPress Address or Site URL) you will need to use the Interconnectit Search and Replace tool to search for and replace all instances of your old WordPress Address (URL) to match the URL you want to use for your Pendeo site.
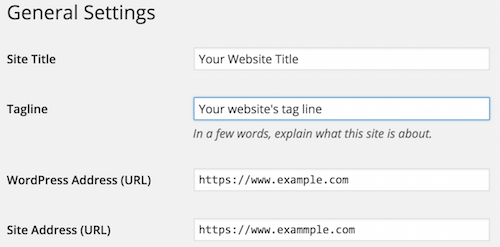
You can find your existing site’s WordPress Address by looking in the General Settings of your existing site’s WP-Admin.
To work out what strings to enter into the Search and Replace tool, read the following examples and then proceed according to the instructions below.
Example 1 – your existing site (the site you copied) had the URL of www.example.com. You are migrating to Pendeo and want to use the Pendeo development URL which is www.example.com.wp.pendeopress.com so that you can carry on development. In this case you would enter, without quotes: “www.example.com” in the search box and “www.example.com.wp.pendeopress.com” in the replace box.
Example 2 – your existing site (the site you copied) had the URL of www.example.com. You are migrating to Pendeo and want to use example.com. In this case you would enter, without quotes: “www.example.com” in the search box and “example.com” in the replace box.
Example 3 – your existing site (the site you copied) had the URL of www.example.com. You are migrating to Pendeo and want to use www.anotherdomainentirely.com. In this case you would enter, without quotes: “www.example.com” in the search box and “www.anotherdomainentirely.com” in the replace box.
Example 4 – your existing site (the site you copied) had the URL of www.example.com. You are migrating to Pendeo and want to use the same domain name. In this case you do not need to do anything.
To update your database with the correct URL, working on your Pendeo site, do the following:
- Download Interconnectit Search and Replace tool
- Extract the php file and rename it to something random – for example “xywjsydhe.php”
- sFTP the renamed file to the root of your Pendeo site, then browse to the URL of the file e.g. yourpendeosite.dom/xywjsydhe.php
- You’ll be presented with the option to populate the database details – do this and continue following the instructions.
- At the point at which you can select the tables to modify, make sure all your tables are chosen (click on the first table name then hold shift and hit the down arrow key to highlight them all). In some cases we would also recommend clicking the option to exclude making changes to the GUID field.
- At the Search and Replace point, you should type in the old URL to search on and then in the replace field, type in the new URL.
- Triple check what you entered, making sure that you didn’t accidentally add any spaces before or after each string in the search and replace boxes, then proceed to complete the script.
- After it completes, the script will show you how many modifications were made. You can verify that it’s done what you expected by checking that links between pages are linking to the new URL and not the old.
- Use sFTP to delete the script from your site.
Important – After you have finished with the script, you must delete it. This is very important otherwise anyone who finds it on purpose or by accident will have carte blanche to make changes to your database!
You should now be able to login to wp-admin on your site!
Comments
No comments on 'Migrating Your WordPress Site to Pendeo.'